DynamoDB + Pulumi - The Ultimate Guide w/ Examples

Written by Lakindu Hewawasam
Published on July 3rd, 2022
Time to 10x your DynamoDB productivity with Dynobase [learn more]
Introduction
DynamoDB plays a crucial role in the serverless ecosystem. It offers a fully managed, highly scalable, and low latency NoSQL database service for developers. However, using the AWS Console to provision these resources can decrease productivity and development efficiency.
Therefore, developers have adopted IaC (Infrastructure as Code) tools to manage cloud infrastructure directly from the code.
Why DynamoDB With Pulumi?
Pulumi is a commonly used open-source IaC tool that allows developers to create, deploy and manage cloud infrastructure. Pulumi enables developers to provision a DynamoDB table with minimal effort. All you have to do is create an instance of the DynamoDB table class offered by Pulumi.
Pulumi offers seamless integrations with DynamoDB. For example, developers can bind a Lambda function to a stream event and configure backups, encryption, and autoscaling with minimal effort, allowing faster development and feature release times.
What's Better for DynamoDB - Pulumi or Terraform?
Pulumi is not the only IaC tool to manage cloud infrastructure. For example, Terraform is a popular IaC tool a developer can use to manage cloud infrastructure.
Compared to Terraform, Pulumi allows developers to use their preferred programming language to manage infrastructure. For example, you can use Node.js or Java, .NET, or Python to provision and manage infrastructure. On the other hand, Terraform requires developers to learn their syntax: HCL (HashiCorp Configuration Language), to manage cloud resources. It requires an additional learning curve which increases the time to release.
So, working with Pulumi is much easier if you do not feel familiar with HCL. So, let's have an in-depth walkthrough on provisioning a DynamoDB table and a CRUD API to interact with it using Pulumi.
Demonstration
Step 1 - Pre-requisites
Before proceeding, make sure that you have:
- Set up your AWS Profile.
- Installed Node.js.
- A package management software - Homebrew (for Mac) or Chocolatey (For Windows)
- Pulumi CLI - For Mac, you can install it using the command -
brew install pulumi/tap/pulumi, and for Windows, you can install it using the command -choco install pulumi.
Please create a new directory in your preferred location and open it using the below command.
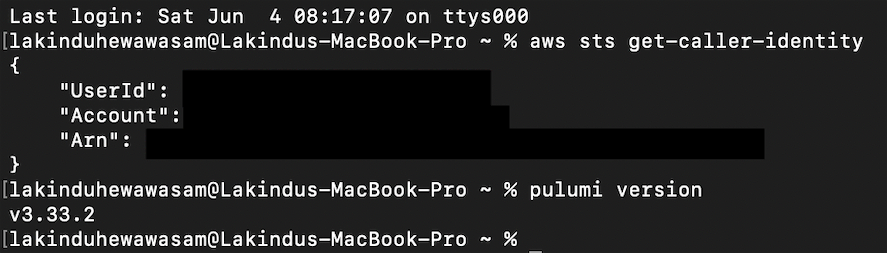
Figure - The expected outcome of the executed commands
Step 2 - Initializing a Pulumi project
Create a new directory in your preferred location and navigate to it using the command shown below.
Please note that I will be implementing the sample project using TypeScript, but you are free to implement it in any programming language supported by Pulumi.
Run the commands shown below to initialize a project in TypeScript.
The second command will start an initialization wizard and prompt you to provide the following.
- Project Name - pulumi-dynamodb-api
- Project Description: Sample CRUD API to demonstrate DynamoDB using Pulumi.
- Stack: dev
- AWS Region: Preferred AWS region.
After providing the required information, the CLI will install the required NPM packages and display the output below.
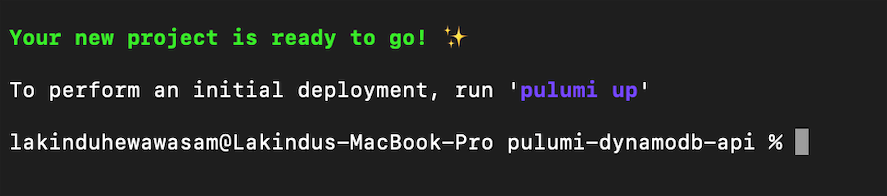
Figure - Successfully initializing a Pulumi project
Next, open the project, navigate to the index.ts file and remove the S3 initialization.
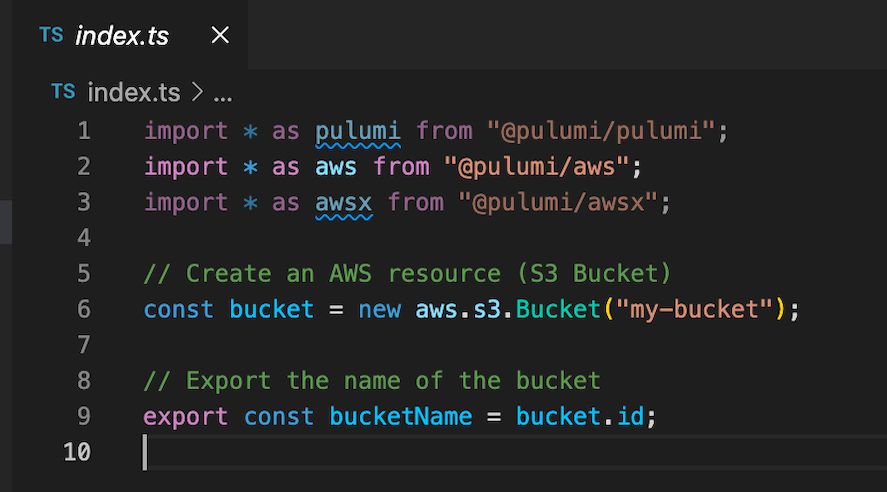
Figure - Resources to remove in the file.
Step 3 - Provisioning the DynamoDB Table
Create a new directory titled dynamo in the project root directory. We will use this directory to manage all the DynamoDB tables. Next, create a new file named users.ts in the dynamo directory.
Your directory structure should look as shown below.
Open the file - users.ts and add the code shown below.
The above snippet declares a DynamoDB table named users with two attributes (id as the hash key and createdAt as the range key) in the Provisioned (default) billing mode with 30 WCU and RCU.
However, you can use PAY_PER_REQUEST as the billing mode to allow DynamoDB to scale up and down on its throughput when necessary.
Afterward, navigate to theindex.ts file and update it with the below code:
You must declare all Pulumi resources in the index.ts to allow Pulumi CLI to provision them.
Once you've added the snippet, run the command pulumi up --stack dev in the terminal. It will display the output shown below.
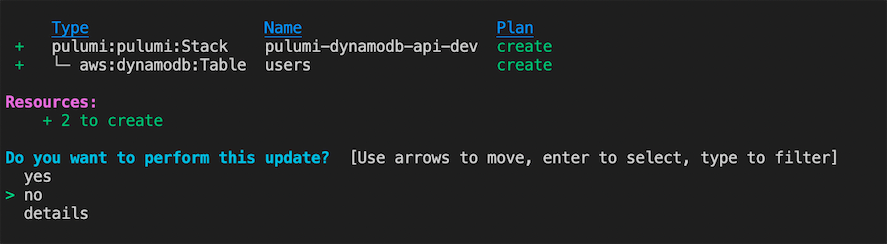
Figure - Provisioning the table using Pulumi.
The figure above shows the Planning phase. Pulumi displays the resources that it will update. Select Yes to provision your DynamoDB table.
If the table is provisioned successfully, you should see the output below.
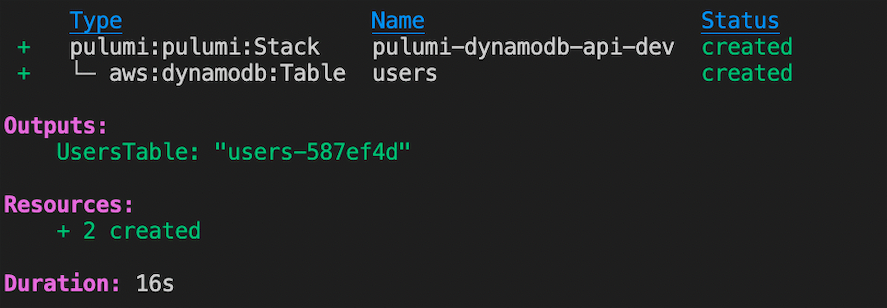
Figure - Viewing the provisioned results
You can visit the DynamoDB Console in the previously specified region and see the table you've provisioned using Pulumi.
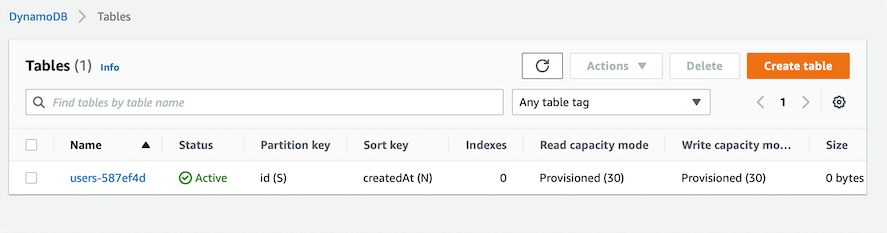
Figure - Viewing the provisioned table in the AWS Console
Pulumi allows developers to have finer control of the table configurations. It enables you to manage table settings such as:
- TTL
- Point in Time Recovery
- Encryption
- Local Secondary Indexes
- Global Secondary Indexes
- Streams
Time To Live (TTL)
To enable TTL and provide a lifespan for your item, you need to allow TTL for your DynamoDB table.
Pulumi disables TTL by default, but developers can configure TTL by adding the snippet shown below to the existing table configuration.
The snippet above enables TTL for the provisioned Users table. When an item has the deleteAt attribute in Number format, DynamoDB will delete the item after the specified time elapses.
Point in Time Recovery (Backups)
Pulumi allows developers to manage Point in Time Recovery of the DynamoDB table. It ensures that you can turn on backups and roll back data on the table over the last 35 days.
To enable this, add the snippet below to the existing table.
Encryption
DynamoDB provides out-of-the-box support for encryption at rest with the help of the AWS-owned key. Additionally, Pulumi allows developers to use AWS-managed or customer-owned keys to configure encryption in the table.
Add the code below to the existing table to configure encryption using the default AWS-owned key.
Suppose you are using a customer-managed key. The serverSideEncryption object accepts a second parameter named kmsKeyArn that accepts the ARN of the KMS Key.
Local Secondary Indexes
Pulumi allows developers to create local secondary indexes for a table. First, you have to declare the new sort key in the attributes property and use the localSecondaryIndexes property to provide an array of five LSIs per table.
Use the snippet shown below to add an LSI to your table.
After creating the table, Pulumi will drop your existing table and create a new one if you add an LSI. Therefore ensure that you have backed up your table data before adding an LSI.
Global Secondary Indexes
Pulumi allows developers to add 20 GSIs (on the default quota) to a DynamoDB table. To create a GSI, add the new hash and range keys to the attributes array and use the globalSecondaryIndexes property in the table to provision a new GSI with the projected attributes.
This is shown below.
Streams
Pulumi allows you to set up streams quickly. By default, Pulumi disables streams, but you can add the code shown below to enable streams on DynamoDB.
The streamViewType can be configured to access one of the following records in the stream.
- New and old item: Use
NEW_AND_OLD_IMAGES - Only the old item: Use
OLD_IMAGE - Only the new item: Use
NEW_IMAGE - Only the keys of the item:
KEYS_ONLY
After enabling the stream, developers can bind a Lambda function to process the stream data. They can do this by binding a Lamda function for the onEvent function of the Users table object:
The snippet above shows the stream event of the table that invokes a Lambda function named users-stream-lambda that will print the stream images to the console. Note that the way you process the stream images depends on the streamViewType.
The batchSize helps configure the number of records sent to the Lambda function.
Additionally, Pulumi binds the required IAM Roles and permissions for the stream events.
Step 4 - Observing the Final Table File
After adding the required table configurations, the users.ts file will look as shown below.
Afterward, run the pulumi up --stack dev command to start provisioning the newly added properties.
You should see the output shown below.
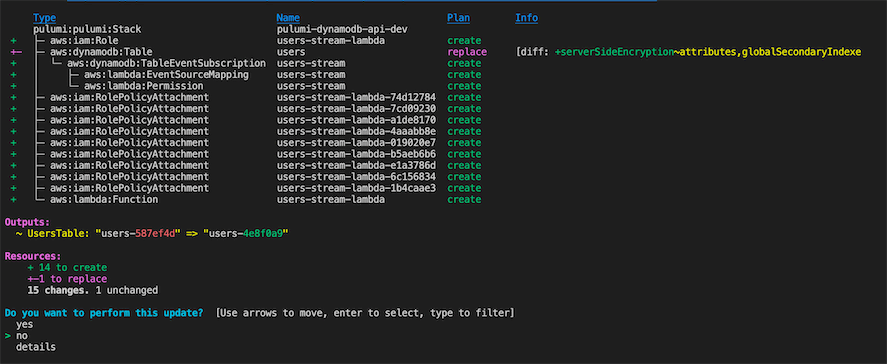
Figure - Observing a preview of the table after adding the new settings
Pulumi creates an IAM Role for the users-stream-lambda and automatically takes care of binding the required IAM Role and Policies for the Lambda function.
Select yes, and let Pulumi configure the table settings.
If Pulumi successfully provisions the required resources, you should see the output below.
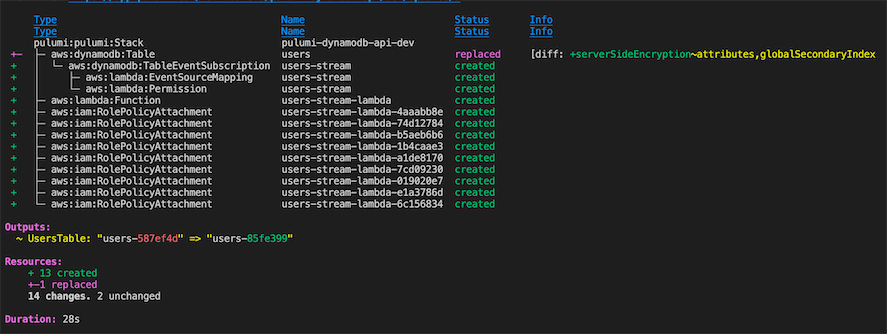
Figure - Successfully provisioning the required changes
Step 4 - Provisioning the CRUD API with API Gateway
Step 4.1 - Adding the Business Logic
After creating the table, we can create a REST API to interact with it using the API Gateway that invokes Lambda Functions. The API will be able to do the following functions.
- Create a user
- Update a user
- Fetch all users
- Delete a user
Pulumi bundles the AWS SDK that developers can use to perform queries. Therefore, you do not need to install the AWS SDK manually.
First, create a new directory named api-gateway and create two files named lambdas.ts and index.ts. The directory structure should look as shown below.
The lambdas.ts will contain the Lambda functions and the business logic, while the index.ts will provision the API Gateway.
Open the lambda.ts file and add the import shown below.
Afterward, add the code shown below to declare the business logic for each function of the API.
Create User
Here, a user is created based on the information passed from the user request. Additionally, the sort key is specified with the createdAt as the current time on the server. This item will get deleted after five days due to the deleteAt TTL attribute.
Afterward, the user is persisted to the Users table and the created user is returned back to the client.
Update User
updateUser function dynamically builds an update expression based on the attributes passed from the client. Then, it updates the user information using the composite partition key and returns the updated attributes.
Delete User
deleteUser function deletes a user using the composite partition key.
Fetch all Users
getAllUsers function scans the entire User table and returns the users to the client. For production workflows, avoid using "Scans" whenever possible.
Use the Dynobase Query Builder to write efficient and optimized queries that you can directly use in your TypeScript code.
Step 4.2 - Creating the API Gateway
After declaring the Lambda functions, we can integrate them into the API Gateway. The snippet below shows a configured API Gateway with four routes that clients can use.
Afterward, import the created apiGateway and export the URL as shown below. Clients can use this URL to invoke the API Gateway.
Pulumi automatically creates the Lambda execution role and allows the API Gateway to invoke these functions. Run pulumi up --stack dev and select "Yes" to provision your API on the cloud.
Please note that you will have to re-run the command to provision the "stage" for the API Gateway successfully.
You should see the output shown below.
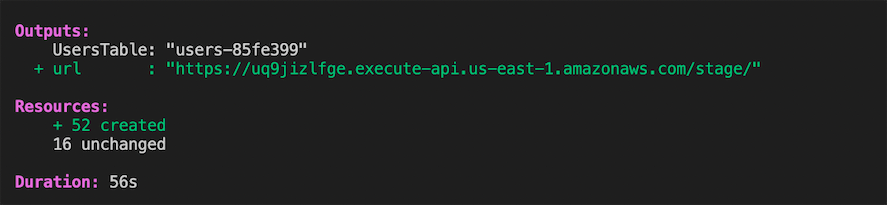
Figure - Provisioning the API Gateway
Step 5 - Consuming the DynamoDB table using the API
You can copy the URL shown in the outputs section, append the API routes, and consume the API by providing the required data.
The expected outputs for the invocations are shown below.
Create User
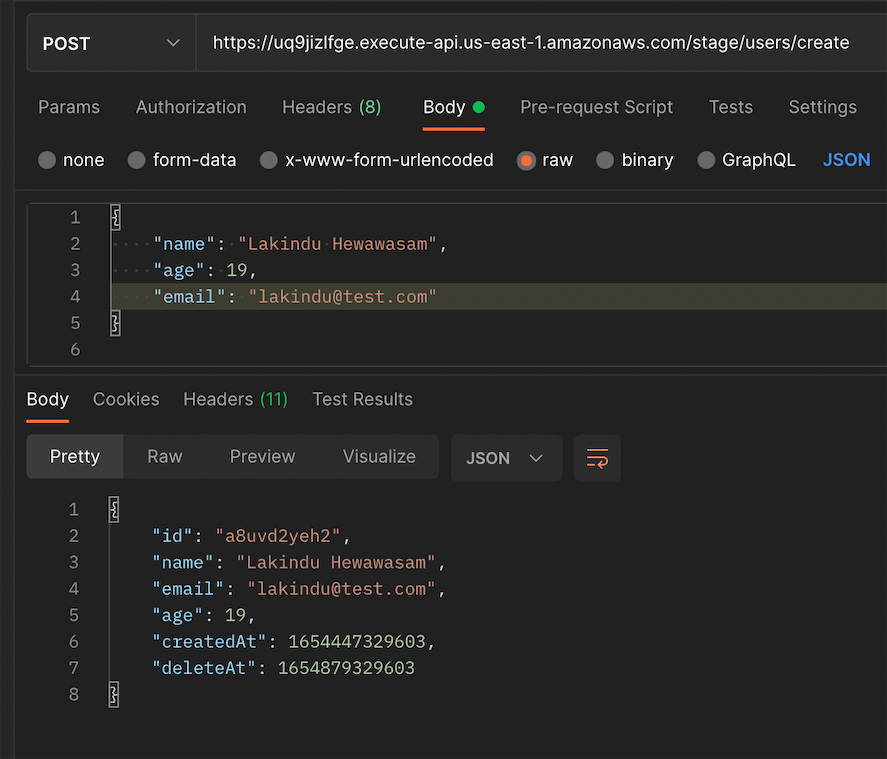
Figure - Output: Create User
Update User
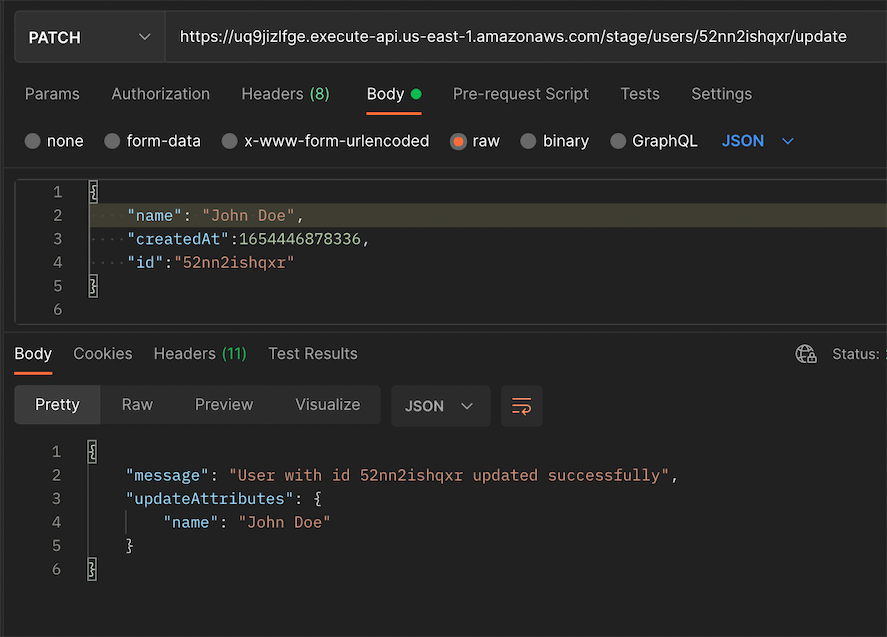
Figure - Output: Update User
Delete User
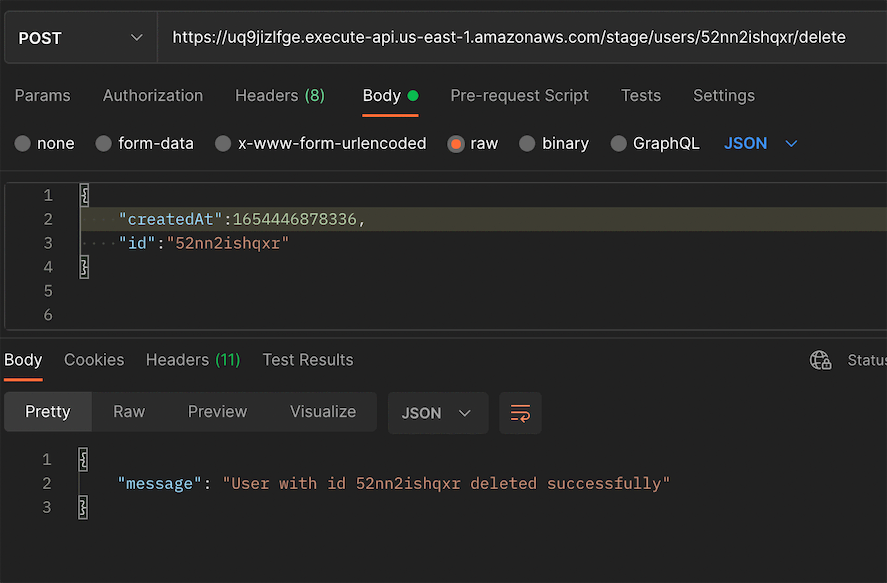
Figure - Output: Delete User
Fetch all Users

Figure - Output: Fetch all users
Additionally, visit CloudWatch and observe the outputs for the Lambda that gets invoked to process the stream events.
Conclusion
This article provided a walkthrough on provisioning a DynamoDB table and CRUD API using Pulumi to create a simple production-ready, cloud-native application.
The sample application developed in this article is available in my GitHub repository.
I hope that you have found this article helpful.
Thank you for reading.