DynamoDB + Terraform - The Ultimate Guide w/ Examples

Written by Lakindu Hewawasam
Published on March 10th, 2022
Time to 10x your DynamoDB productivity with Dynobase [learn more]
Introduction
When building complex applications that rely on vast infrastructure, you most likely use "Infrastructure as Code" tools to provision and manage your cloud infrastructure. Included in this extensive infrastructure is your database service. For example, when building serverless applications with AWS, a go-to choice is DynamoDB due to its automatic scaling to meet request demands.
Why DynamoDB with Terraform?
Terraform is an open-source Infrastructure as Code (IaC) tool developed by HashiCorp to provision and manage cloud infrastructure. DynamoDB pairs well with Terraform. Why? It allows you to create your table with your required options using minimal code to enforce quick development times. Moreover, it integrates seamlessly with other AWS infrastructure (AWS Lambda, API Gateway), allowing you to build full-fledged applications (that interact with DynamoDB) quickly.
Which is better for DynamoDB - Serverless Framework or Terraform?
Terraform isn't the only IaC tool around. For example, there's the ever-so-popular - "Serverless Framework" that allows you to build serverless applications using DynamoDB within minutes.
So, why should you use Terraform?
Mainly, all the resources you create in your Serverless application are application scoped. It means that if you choose to destroy your Serverless application, the DynamoDB tables you created with it get destroyed as well. However, Terraform allows you to provide cloud resources and share them quickly and effectively across multiple serverless applications.
If I have convinced you that managing DynamoDB tables using Terraform is easy, let me proceed with a tutorial on provisioning a DynamoDB table using Terraform and creating a simple CRUD API to interact with the table.
Demonstration
Step 1 - Pre-requisites
Make sure you have:
- Set up your AWS Profile
- Node.JS
- Homebrew (Mac) (
brew install hashicorp/tap/terraform) / Chocolatey (Windows) (choco install terraform) - Terraform
You should be able to run the following command with any issue.
Step 2 - Initializing the AWS Provider in Terraform
Create a new folder in a directory that you prefer to get started.
Afterward, create a file - main.tf. Your file structure should be as shown below.
We will use this file to define the provider (plugin to manage cloud resources with Terraform) and connect Terraform to our AWS Account.
Open your main.tf file and the code shown below.
The terraform {} ensures that the current Terraform configuration will use the AWS Provider from the Terraform Registry to manage infrastructure.
The provider {} ensures helps configure the specified provider. In this case, we configure the AWS Provider to use the configuration file created by the AWS CLI and to host resources in the Virginia region.
After adding this snippet, launch a terminal in the active directory and run terraform init. It will initialize the configuration directory and install the required provider (AWS) on your device.
You should see the output below.
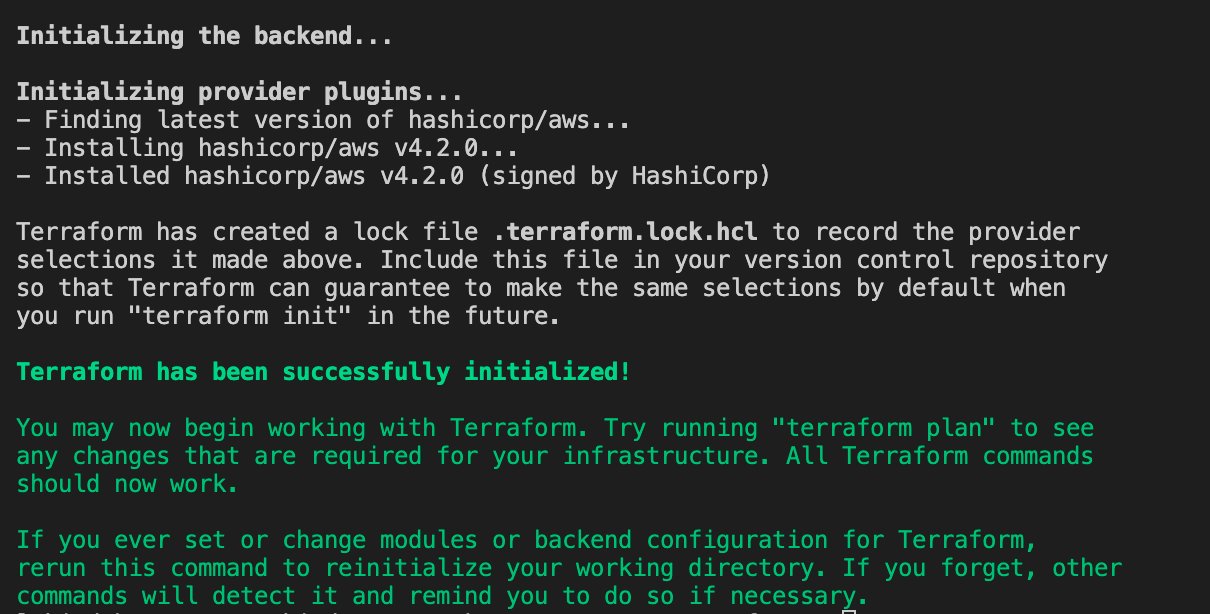
Figure 1 - The expected output after initializing the provider.
Step 3 - Provisioning the DynamoDB Table
Next, you can define your DynamoDB table. With Terraform, declaring resources is easy. The convention for declaring resources is shown below.
To get the AWS resource name, visit the Terraform AWS Registry. Your DynamoDB table can be set up by adding the configuration below to your main.tf file.
The snippet above shows a simple DynamoDB table declaration. It is defined in the provisioned billing mode, indicating that the table will be provisioned with a pre-defined read, write capacity. It also has a hash key of "noteId."
To provision this resource:
- Execute
terraform plan: This will display the pending changes. - Execute
terraform apply: This will provision your resources.
Afterward, you should see the following output.
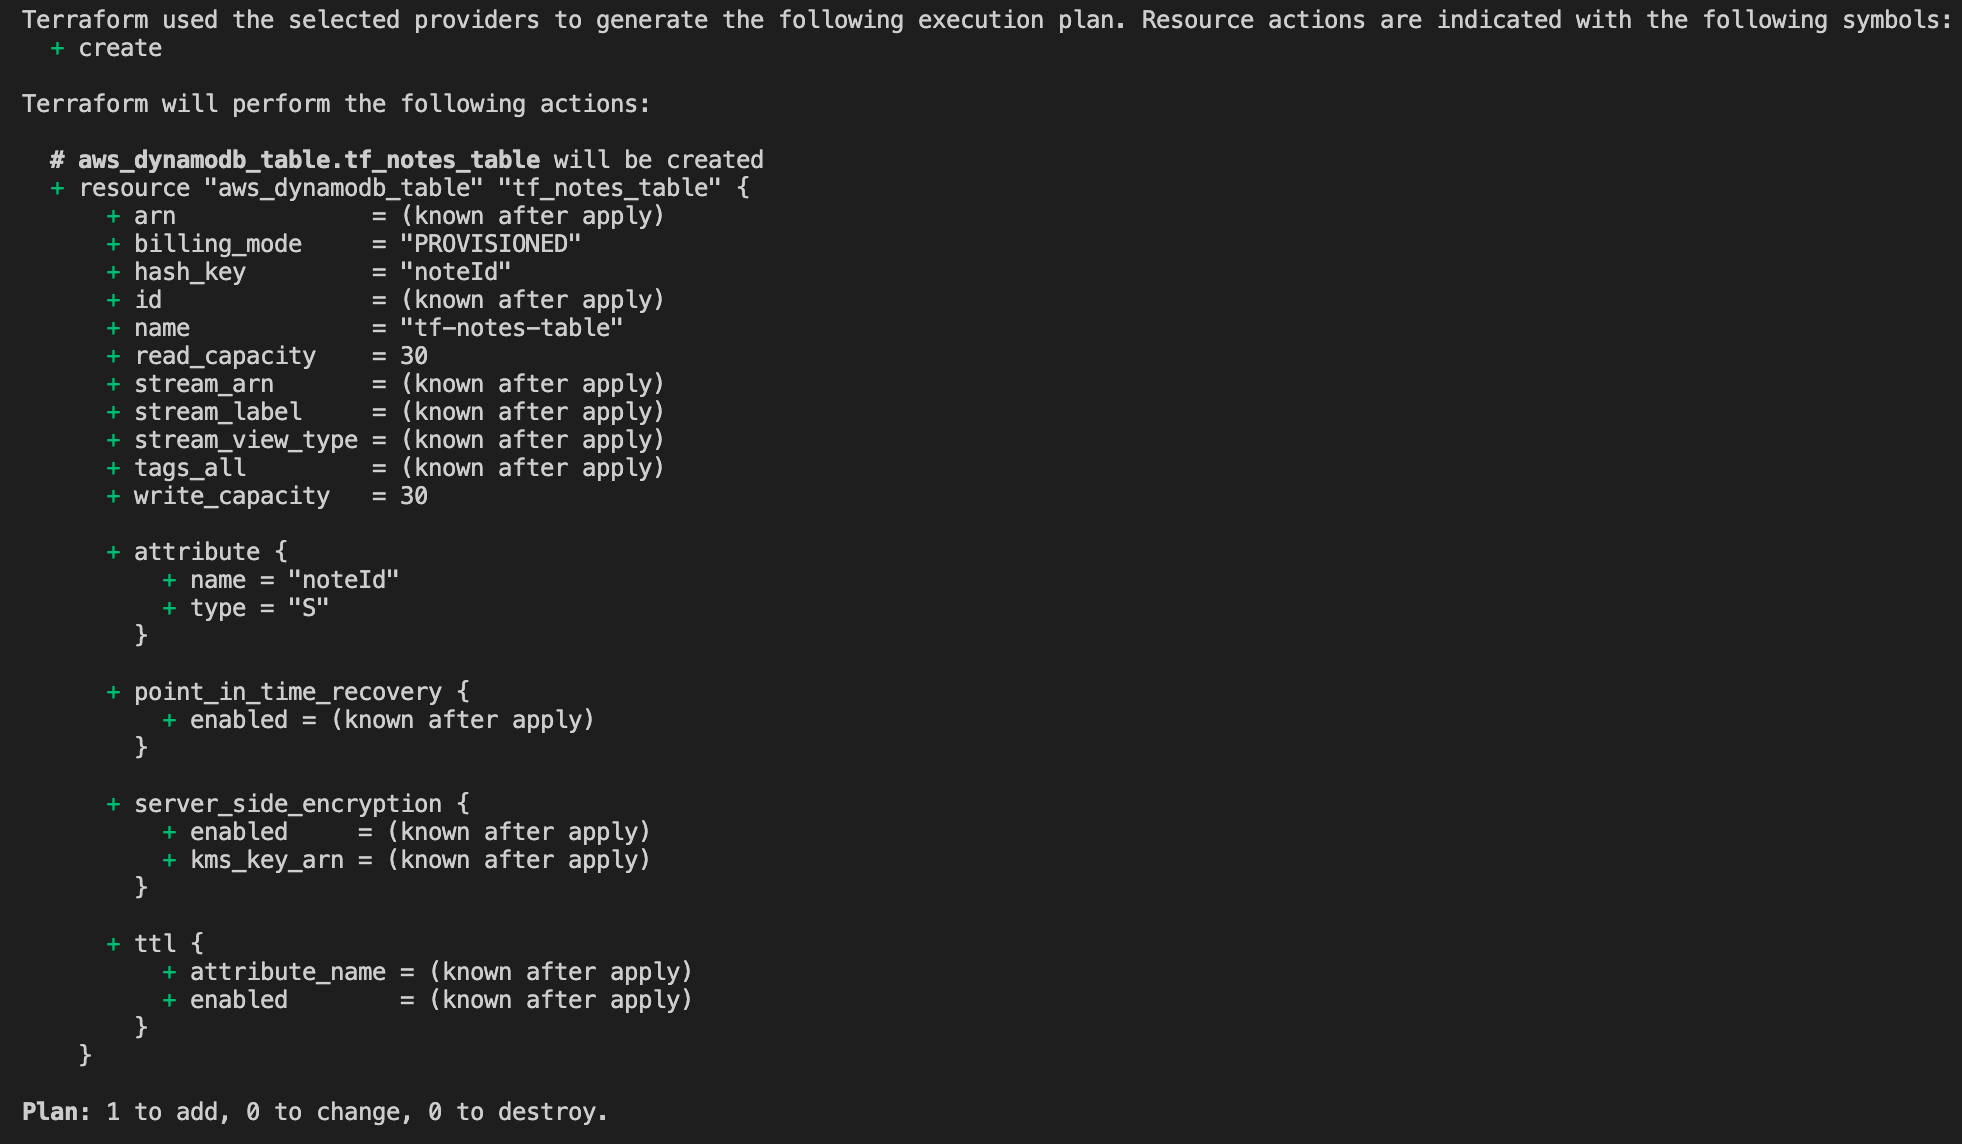
Figure 2 - Planning the resources to provision
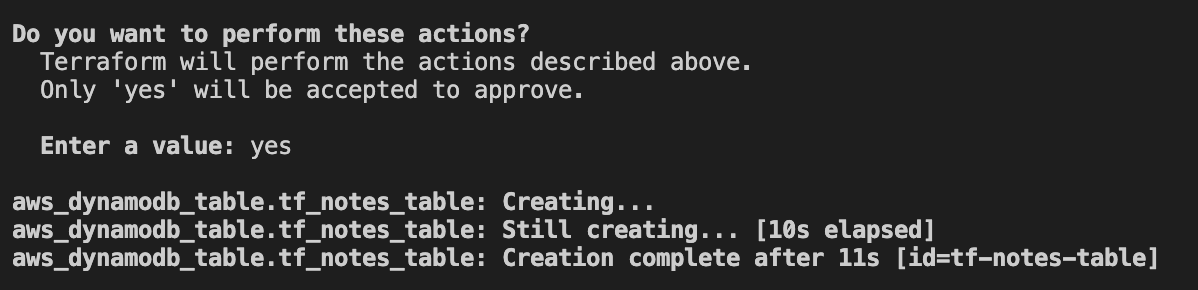
Figure 3 - Provisioning the DynamoDB table
You just created a DynamoDB Table with Terraform. But Terraform offers you everything the AWS Console does. For example, you can configure Auto Scaling, TTL, and more!
TTL (Time To Live)
To configure an expiry time for your data item, you must configure Time to Live. To do so, add the ttl attribute to your table declaration, as shown below.
The attribute expiryPeriod enforces TTL where after the specified period exceeds, DynamoDB deletes the item.
Point in Time Recovery
To ensure your data can get restored in case of a disaster, you can enable Point-in-Time Recovery. These are continuous backups created by DynamoDB for your table (when enabled).
To use this, add the following configuration to your table.
Encryption
Out of the box, DynamoDB encrypts your data as rest. Terraform allows you to configure the KMS key used for encryption. This is configured using the block below.
Auto-Scaling
For tables on the PROVISIONED billing mode, you can configure auto-scaling so that DynamoDB scales up to adjust the provisioned capacity based on traffic patterns.
Terraform helps you easily add autoscaling to your table using the autoscaling module. To add this, simply declare the autoscaling module for your table.
When adding this module for your table, Terraform automatically configures the autoscaling policies: read, write and targets: read, write.
Additionally, it provides a default configuration for read/write max capacity along with the read/write cool in/out scale that you can customize. Refer to the complete list here.
After configuring the auto-scaling module by adding the syntax above, re-run terraform init to download the module.
Afterward, add the following property to your table to prevent Terraform from removing your scaling actions.
After adding these configurations to your existing table, your final table resource should look as shown below.
Execute terraform plan to view the changes you made. Then, to provision the resources, execute terraform apply.
Step 4 - Provisioning the CRUD API
After creating your table, we can set up our API using AWS Lambda to maintain the business logic. Our API will consist of three functions.
- Create Note
- Delete Note
- Get all Notes
Initially, we must define the Lambda Policies so that Lambda can access other AWS Services. We must also provide a policy to help Lambda communicate with the created table.
Defining execution role & IAM Policies
Add the policies defined below to your main.tf file.
First, an IAM Role gets created to provide the Basic Execution Role for the Lambda. Then another policy is created to allow all DynamoDB actions on the created table for all resources using the created role.
This role will later get applied to our Lambda functions. Our functions are declared in a separated directory - /lambdas
I initialized an empty Node project by executing npm init in this directory. The directory is as shown below.
We will need the AWS SDK to access DynamoDB. Therefore, install the SDK using npm i aws-sdk on this directory. However, this is not mandatory as the AWS SDK is available in the AWS Lambda environment.
Create Note
In your JS handler function, add the code displayed below.
This is straightforward as we create the new note based on parameters sent in the request.
To create your Lambda function, add the following declaration to your main.tf file.
The archive_file is responsible for creating the zip archive of the handler code (defined above). The archive gets referred to the Lambda Function resource as the filename. The environment variables are used to store a dynamic reference to the defined table name - aws_dynamodb_table.tf_notes_table.name . It helps access the table name from the Lambda Function.
Delete Note
The delete function is similar to the create. The only difference here is that the function requires an ID to identify the note to remove in its event body.
Add the code below to your handler file.
Add the code below to your main.tf file.
Get all Notes
The only thing different in the get all notes function is that we use a DynamoDB scan to scan all the records in the table.
Add the code below to your handler file.
Add the code below to your main.tf file
After adding the three Lambda Functions, run a terraform plan, and a terraform apply to provision your Lambda Functions on the cloud.
Execute the following command on your terminal -aws lambda invoke --region=your-region --function-name=your-function-name output.json to invoke your Lambda functions and test your application communicating with DynamoDB.

Figure 4 - Invoking the created API
Step 5 - State Locking in Terraform
When you use Terraform, you most likely use it in a team environment. Therefore, the chances are that you might do a deployment while your teammate performs one. In such cases, the Terraform state file can get corrupted. Therefore, Terraform supports State Locking. It prevents concurrent updates until the ongoing update releases the acquired lock.
You should save your Terraform state file in a centralized location to implement state locking. For example, in AWS, we store it in Amazon S3 (Terraform Backend). We then need a DynamoDB table with a hash key of LockID that Terraform will use for consistency checking and state locking. So when someone runs terraform plan, the new table will lock its state, thus, preventing concurrent updates.
Create a new file titled state-management.tf in the root and add the code shown below to implement state locking.
The snippet above will create the S3 bucket and the DynamoDB table used for locking. Then, execute terraform apply to provision these resources. The table requires a mandatory hash key named "LockID" with type String for state locking to work.
Afterward, configure the backend by adding the declaration block shown below to your state management file.
Afterward, re-run terraform init to re-initialize the backend. You can choose to migrate the existing state file to the cloud or state fresh when doing this. I migrated my state file, but you can do what is best.
Afterward, every time you make a resource change, you can see Terraform acquiring and releasing a lock!

Figure 5 - Acquiring a state lock

Figure 6 - Releasing a state lock
Viola! We successfully managed our DynamoDB table using Terraform, built a CRUD API to access the table, and added state locking to prevent concurrent updates!
Conclusion
This article looked at provisioning and managing DynamoDB tables via Terraform. We accessed the table using a simple CRUD API designed using Lambda Functions managed with Terraform. Additionally, we implemented Terraform State Locking with S3 and DynamoDB to prevent concurrent state updates.
The code used for this article is available in my GitHub repository.
I hope you have found this article helpful.
Thank you.